
Management solution
Open source
Version Control
Git & GitHub
What is Git?
Git is the most popular open-source version control system in the world.
What is version control? It is the way of the management of changes on documents, computer programs, large websites, and other collections of information.
With version control systems we can;
-> Track the history of our project
-> Work together (collaborate with others effectively).
Why Git?
-> Free
-> Open-source
-> Superfast
-> Scalable
Basic Git commands
-
git init -> creates an empty repository or can make an existing directory a git repository.
-
git clone -> brings a repository that is hosted somewhere like GitHub into a folder on your local machine.
-
git add . -> tracks your files in git
-
git commit -m “your-message” -> saves your files in git
-
git push -> uploads git commit to a remote repo like GitHub
-
git pull -> downloads changes from the remote repo to your local machine, the opposite of push.
What is GitHub?
Github is a code hosting platform for version control and collaboration. It lets you and others work together on projects from anywhere.
You can create an account for GitHub.
You can register here.
After creating an account for GitHub you can;
-> Create and use a repository
-> Start and manage a new branch
-> Make changes to a file and push them to GitHub as commits
-> Open and merge a pull request
Creating a repository
A repository is usually used to organize a single project. Repositories can contain folders and files, images, videos, spreadsheets, and data sets -- anything your project needs. Often, repositories include a README file, a file with information about your project. GitHub makes it easy to add one at the same time you create your new repository. It also offers other common options such as a license file.
Your hello-world repository can be a place where you store ideas, resources, or even share and discuss things with others.
1. In the upper-right corner of any page, use the drop-down menu, and select New repository.
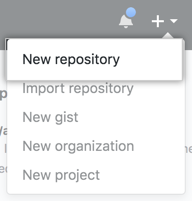
2. In the Repository name box, enter hello-world.
3. In the Description box, write a short description.
4. Select Add a README file.
5. Click Create repository.

Creating a branch
Branching lets you have different versions of a repository at one time.
By default, your repository has one branch named main that is considered to be the definitive branch. You can use branches to experiment and make edits before committing them to the main.
When you create a branch of the main branch, you're making a copy, or snapshot, of the main as it was at that point in time. If someone else made changes to the main branch while you were working on your branch, you could pull in those updates.
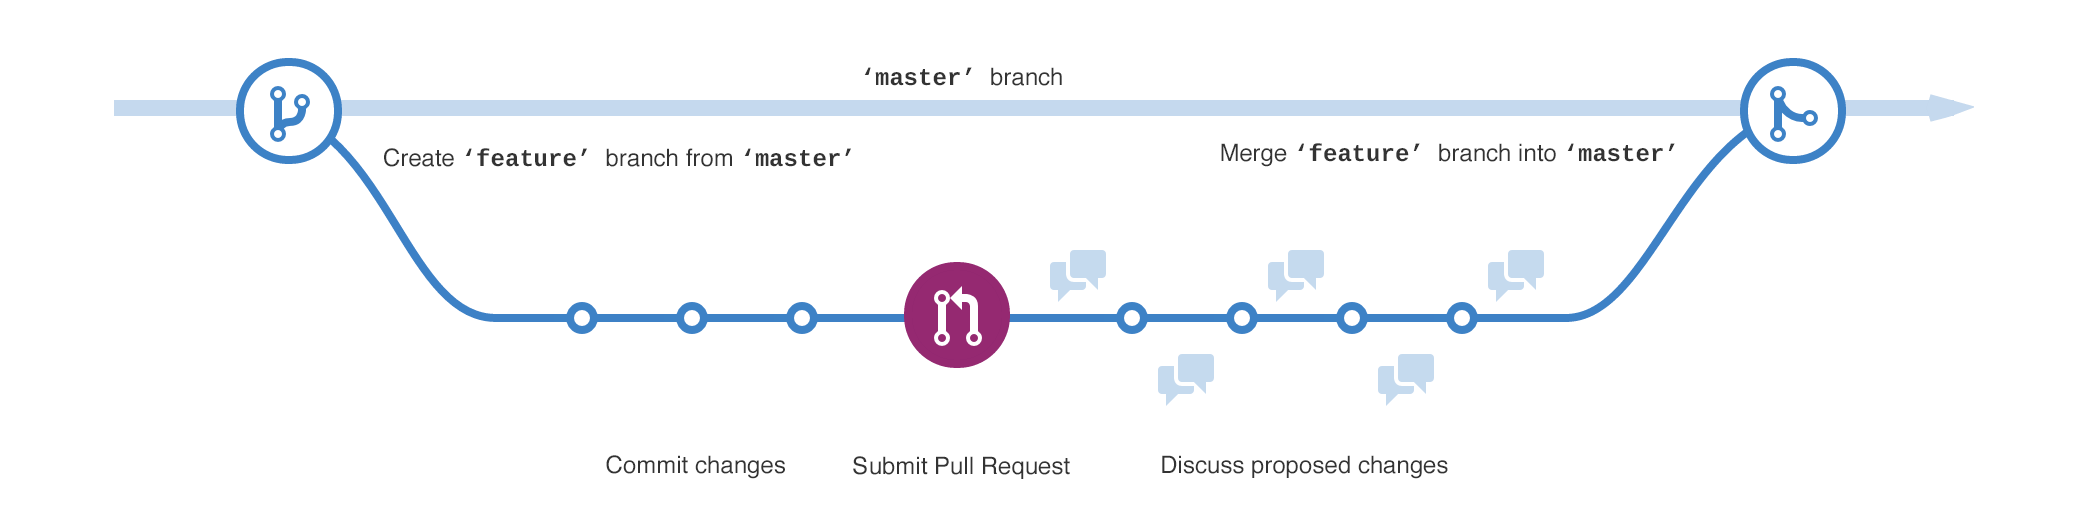
This diagram shows:
-> The main branch
-> A new branch called feature
-> The journey that feature takes before it's merged into main
Have you ever saved different versions of a file? Something like:
-> story.txt
-> story-joe-edit.txt
-> story-joe-edit-reviewed.txt
Branches accomplish similar goals in GitHub repositories.
Here at GitHub, our developers, writers, and designers use branches to keep bug fixes and feature work separate from our main (production) branch. When a change is ready, they merge their branch into main.
Create a branch
1. Click the Code tab of your hello-world repository.
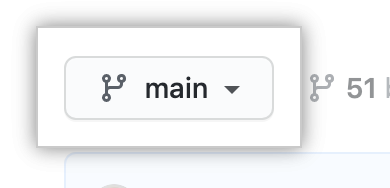
2. Click the drop-down at the top of the file list that says main.
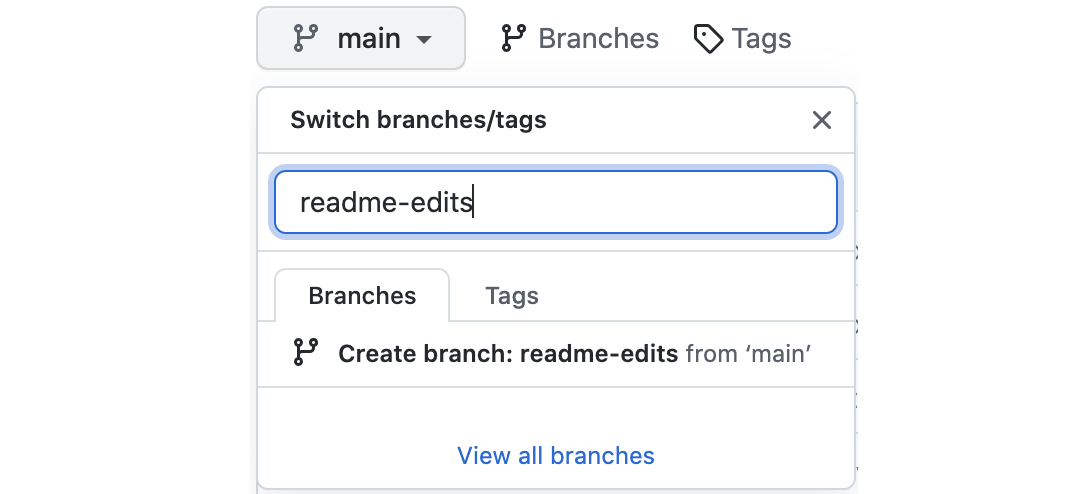
3. Type a branch name, readme-edits, into the text box.
4. Click Create branch: readme-edits from main.
Now you have two branches, main and readme-edits. Right now, they look exactly the same. Next, you'll add changes to the new branch.
Making and committing changes
When you created a new branch in the previous step, GitHub brought you to the code page for your new readme-edits branch, which is a copy of main.
You can make and save changes to the files in your repository. On GitHub, saved changes are called commits. Each commit has an associated commit message, which is a description explaining why a particular change was made. Commit messages captures the history of your changes so that other contributors can understand what you’ve done and why.
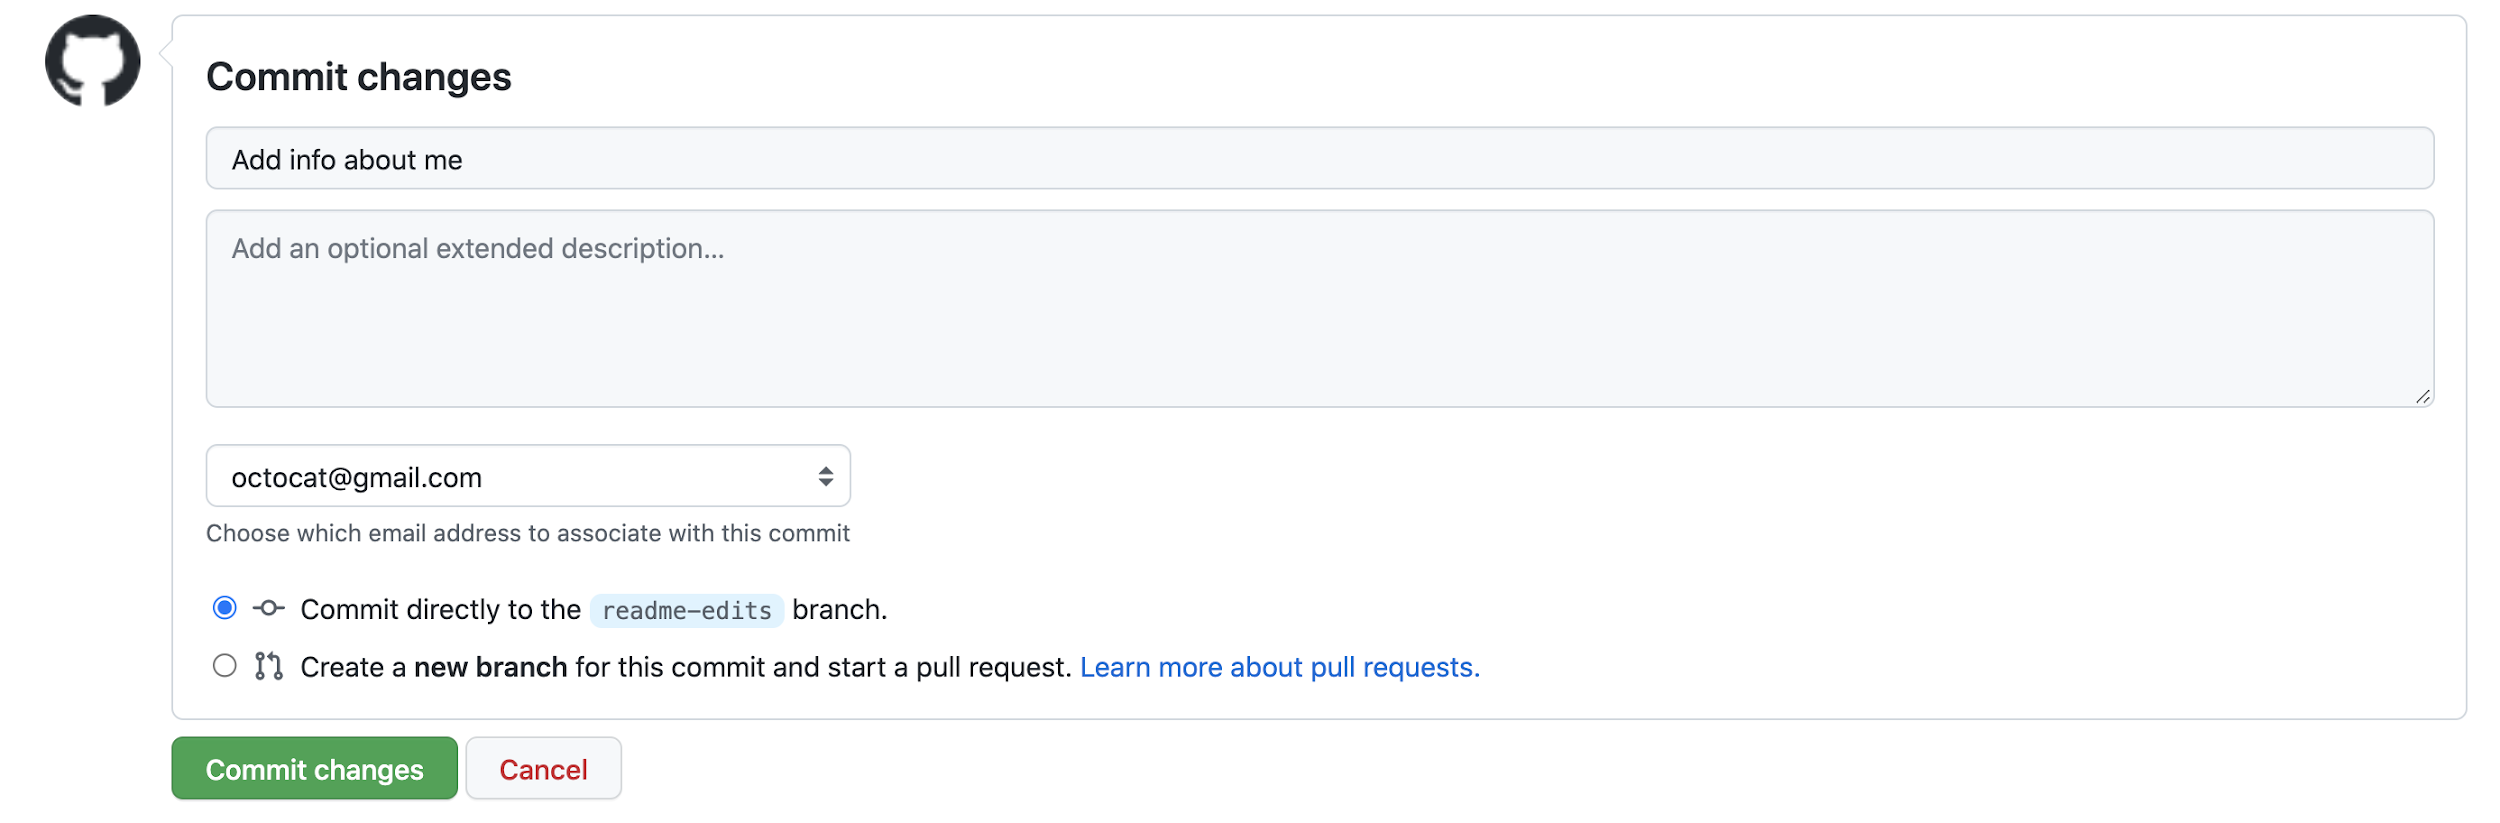
1. Click the README.md file.
2. Click to edit the file.
3. In the editor, write a bit about yourself.
4. In the Commit changes box, write a commit message that describes your changes.
5. Click Commit changes.
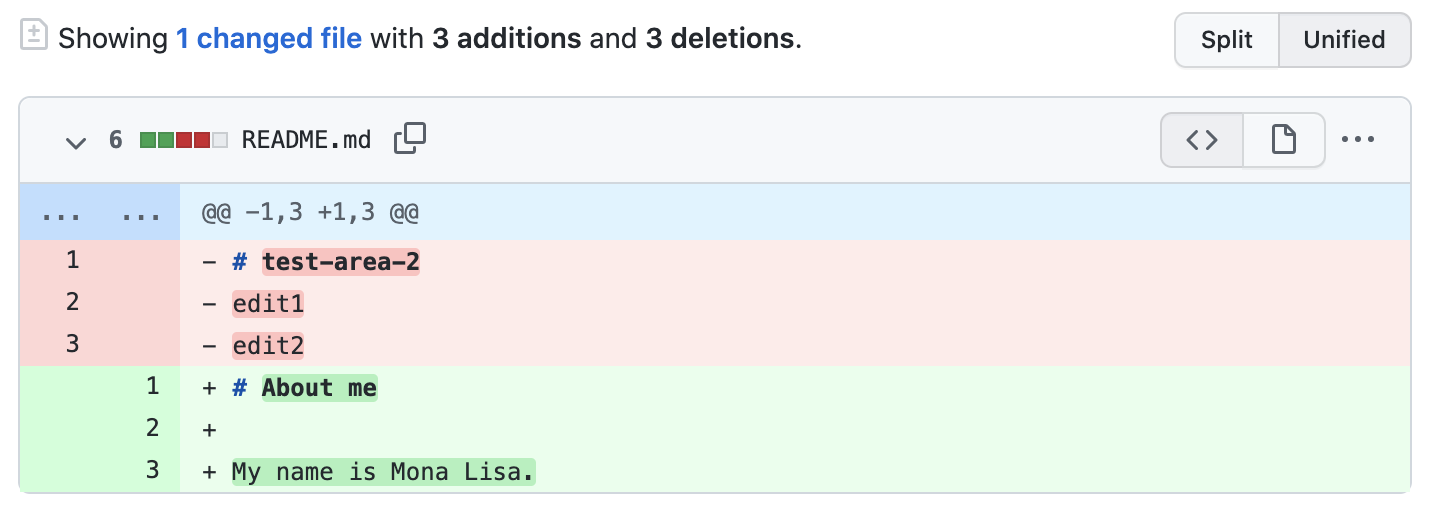
These changes will be made only to the README file on your readme-edits branch, so now this branch contains content that's different from the main.
Opening a pull request
Now that you have changes in a branch of main, you can open a pull request.
Pull requests are the heart of collaboration on GitHub. When you open a pull request, you're proposing your changes and requesting that someone review and pull in your contribution and merge them into their branch. Pull requests show diffs, or differences, of the content from both branches. The changes, additions, and subtractions are shown in different colors.
As soon as you make a commit, you can open a pull request and start a discussion, even before the code is finished.
By using GitHub's @mention feature in your pull request message, you can ask for feedback from specific people or teams, whether they're down the hall or 10 time zones away.
You can even open pull requests in your own repository and merge them yourself. It's a great way to learn the GitHub flow before working on larger projects.
1. Click the Pull requests tab of your hello-world repository.
2. Click New pull request.
3. In the Example Comparisons box, select the branch you made, readme-edits, to compare with main (the original).
4. Look over your changes in the diffs on the Compare page, make sure they're what you want to submit.
5. Click Create pull request.
6. Give your pull request a title and write a brief description of your changes. You can include emojis and drag and drop images and gifs.
7. Click Create pull request.
Your collaborators can now review your edits and make suggestions.
Merging your pull request
In this final step, you will merge your readme-edits branch into the main branch.
1. Click Merge pull request to merge the changes into main.
2. Click Confirm merge.
3. Go ahead and delete the branch, since its changes have been incorporated, by clicking Delete branch.
Next steps
By completing this blog tutorial, you've learned to create a project and make a pull request on GitHub.
Here's what you accomplished in this blog tutorial:
-> Created an open-source repository
-> Started and managed a new branch
-> Changed a file and committed those changes to GitHub
-> Opened and merged a pull request
Take a look at your GitHub profile and you'll see your work reflected on your contribution graph.
That was all about Git & GitHub. Drop a like and share it if you found it informative.
Have a productive day, let's meet in the next blog!
Sunday, Dec 19, 2021